In this month's edition of our Tips and Tricks series, our Support Team Director, Brandy, discusses User-Specific Settings, with the goal of making you aware of all the different ways you can customize Details just the way you like it. If you missed our live webinar, here is a complete session recap!
User Specific Settings
Everything that we are going to discuss today, is an option that you as an individual can turn on yourself, and it's not going to affect the other members of your team.
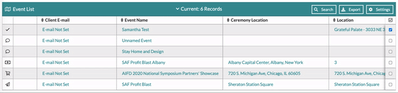
Pulling Reports from The Event List
For those who may be unaware, this is a search option, but also a reporting tool. For example, if every month, you wanted to see how many people were referred to you by a specific entity, (perhaps this is a venue you are working with or a previous customer), you could pull that report from this page. From here, you can change the view to your past events, current events, past events, or all events. When you are ready to save your search, you will click on the menu option in the top right corner and select, 'Save Search & Report". Once selecting 'Save Search & Report', you will then have the option to have this report only show up for you, or, you can also select to have it shared with your team. Once you select your preference, name the report accordingly, and 'Save'. Let's say next month, you want to access this same report, you will click into the menu option on the top right corner of the screen and select "Load Search/Report".
ADJUSTING YOUR EVENT LIST SETTINGS
There are many options to customize how your Event List is displayed and how you interact with it; the combinations are nearly endless. To start editing the settings, click the 'Settings' button in the top-right corner of the list. A window will open in the center of the screen, displaying all of the options for customization.
Reminder: All changes made on this page will be customized to you, not your entire team
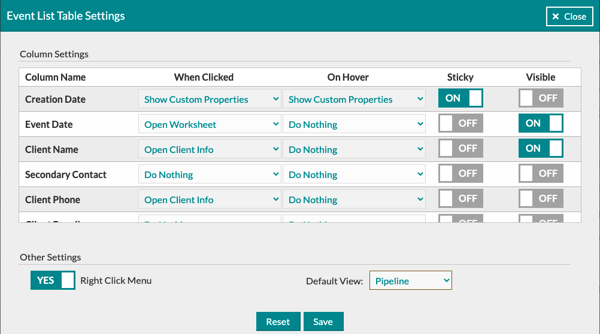
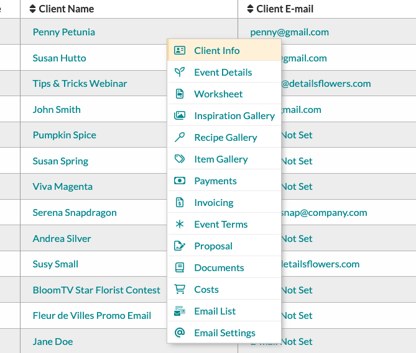
One of the first things you will see is the Column name. This is the column's title and an indicator of what information is included. You will use the drop-down menu to determine what action should occur when data within the associated column is clicked. You'll notice there are many options!
Note: There is an essential distinction between the 'Open' and 'Show' functions. If an 'Open' option is selected, the corresponding page will be opened by clicking on the associated information. If a 'Show' option is selected, a pop-up window will be displayed on the Event List without directing you to another page.
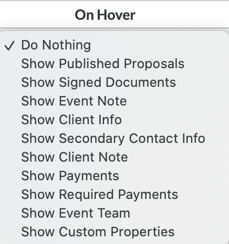
Each corresponding option will display a pop-up window on the Event List relating to the associated event.
If a column is sticky, it will hold its place in the list when scrolled. This means that when you scroll far enough to the right that the column would usually be hidden from view, it will instead hold its place, and the adjacent columns will scroll behind it.
Here's an example of what it looks like when scrolling with sticky columns:
Under the 'Other Settings' section, you'll see an option to toggle the 'Right-Click Menu' on and off.
The Right-Click Menu will allow you to right-click on any column of any event to quickly and easily navigate to various related pages for that event.
This feature makes it very easy to navigate, but it will override the default right-click options in your browser, so keep that in mind!
Be sure to save any changes by clicking the 'Save' button at the bottom-center of the Event List Settings window! If you get a little carried away and want to revert the Event List settings back to the defaults, click the 'Reset' button at the bottom center.
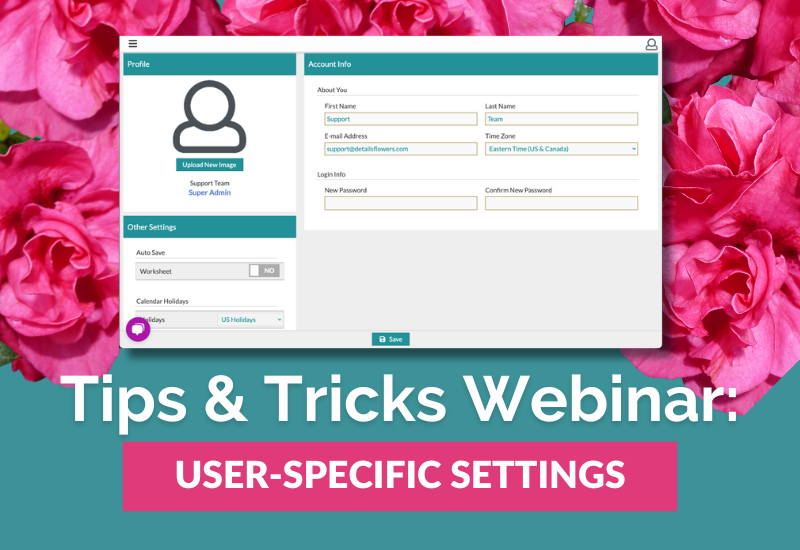
PROFILE INFORMATION & OTHER SETTINGS
Next, we are going to click on the profile icon, also in the top right corner, and go into the 'My Account' area. Once on the Accounts page, you. will see the 'Account Info' section with places for your personal information such as name, email, time zone, and login information.
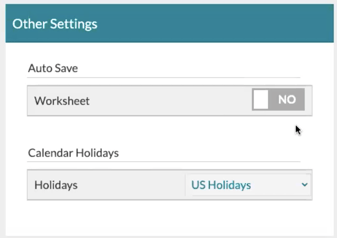
The left-hand side will allow you to insert an image of yourself. Under the profile image, you will see 'Other Settings', which are relatively newer features within Details. If the 'Auto-Save" toggle is in, your worksheet will automatically save every 15 seconds after a change has been made.
*While this will automatically save your worksheet progress, we ALWAYS recommend manually saving your work after making any changes.
Next, we are going to click on the profile icon, also in the top right corner, and go into the 'My Account' area. Once on the Accounts page, you. will see the 'Account Info' section with places for your personal information such as name, email, time zone, and login information.
COLOR PALETTE
Now, let's navigate back to the Event List, and click into an event. Go to the Worksheet page, and we are going to focus on the Color Palette. There are several features within the color palette that are going to be user-specific.
DELETED ITEMS & SECTIONS
Another great thing to notice on the worksheet is under the menu, you will click on 'Edit Worksheet'. If you scroll to the bottom of this section, you will see an area called the 'Removed Sections' and 'Removed Line Items' area.
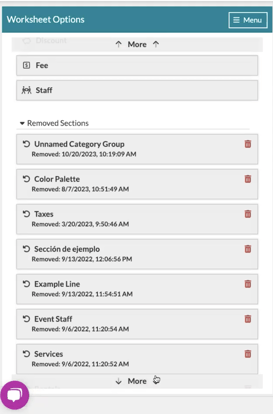
Anything that you delete from the Design Worksheet, you will be able to locate and move back into the Worksheet by accessing these areas (clicking on the trash can will permanently remove that item or sections from the deleted list).
DOCUMENTS RECIPE PDF
On the Recipe PDF, if you click into the 'Settings menu' in the top right-hand corner, a box labeled 'Recipe PDF Options" will appear. All four of these settings: 'Show Recipe Descriptions', 'Show Recipe Notes'. 'Show Line Item Prices', and 'Open Download PDF in New Tab'; will be user-specific.
Watch the full Webinar replay below!