
Every week, we email existing clients with helpful tips and tricks for using Details Flowers Software. The Support Team looks at trending questions each month and identifies ways we can help spread knowledge to everyone using the platform. Ensure you're subscribed to the Education & Support messages from Details to get these helpful emails!
The default list, your 'Current' events, will house off of your prospective and upcoming events. If an event needs to be removed for one reason or another, you have two options:
How do we use these options? Follow these steps from the 'Current' list:
If you have occasion to return an event from the 'Archived' or 'Did Not Book' lists, follow these steps:
Note: This would be a rarity, but entirely possible; a returned event may end up in the 'Past Events' list if the Event Date is in the past.
New Gallery Recipe
Use this option to save a new recipe to the gallery. Do this at any time, with any recipe, just make sure you want to create a brand-new gallery recipe from your design!

Favorite Recipe
Favoriting a recipe will pin it to the Design Board and save it to your Recipe Gallery as a new recipe at the same time!
Once it's on the Design Board you can drag-and-drop it into any other line item making it a quick and easy way to re-use a design from one line item to the next!
Update Gallery Recipe
Say you're using a previously saved recipe and you have a brilliant new idea, think of the perfect new bloom to take it to the next level; use the 'Update Gallery Recipe' to save your changes to your existing recipe for the next time you use it!
Update From Gallery
Using an existing recipe and go a little overboard? Use the 'Update From Gallery' option to revert back to the last saved version of the recipe!
Managing Rental Items
Need a tool to keep track of inventory and where it's stored? Use Details to log and manage all of your rentals!
👉 If you're unfamiliar with adding or editing items, check out this Support Center article: Adding & Editing Items
Inventory can be logged within the Item Details page for each item. To access the Item Details page for an item, click the new window icon or, in the Item pop-up window, click the "More Details" button!
 |
 |
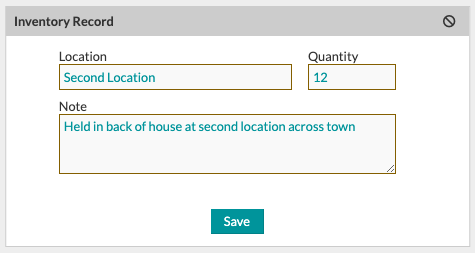
The resulting page is a full-page view of the item containing several modules, including one on the right-hand side for inventory. You'll use this section to make entries for where an item is located and how many are owned.

Within each event is a Cost sheet that can be used to calculate item costs and totals. The rental items will be displayed within their own section of the page, near the bottom, and will display how many you have and how many you need for each included item.
Found under the 'Financials' tab of any of your events is the 'Payments' page. It's where you'll find the payment schedule and log collected payments specific to respective events.
The schedule will start out displaying your defaults, pulled from the 'Financials' page of the Company Settings. If you're not sure what this is, or if you haven't seen it before, take a moment to check out this Support Center article 👉 Financial Defaults
The Support Team gets questions all the time about configuring payment schedules to reflect the correct amounts, and the full amounts of events. So let's look into a specific example where an event amount changed and see how we would go about updating the schedule 👇
This client already paid one of two payments in an event that is being split up 50/50. They made a change and now, as a result, the grand total has changed. The 50% payment from the schedule that was already received is now listed at a greater amount than the amount that was already logged - see the image below.
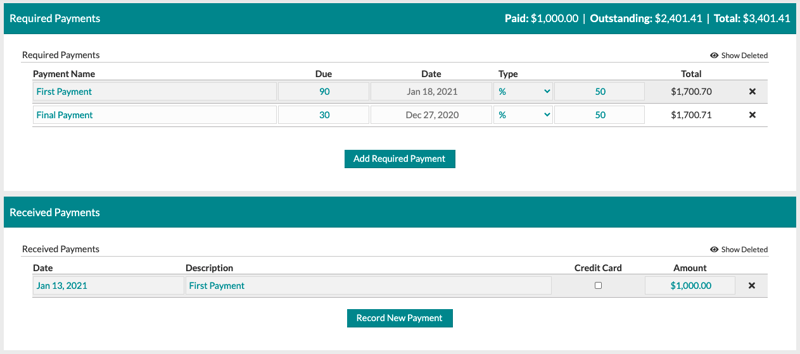
See how the amounts due are both around $1,700, but the payment logged is $1,000?
Now, since the client made that payment to cover the previous amount due for their first installment, this may look confusing to them when it shows that their initial payment is now outstanding because of changes made to the event. So we need to adjust the payment schedule like so 👇
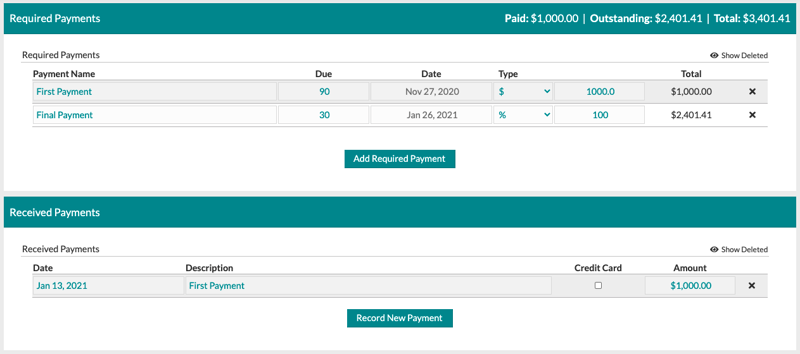
What we've done is to amend the first payment in the schedule to reflect the payment that was already made and then amended our final payment to a percentage-based installment in the amount of 100%.
Now the final payment in the schedule will always include the outstanding balance, regardless of how much that is. That means that if the client adds or removes items from this event and causes further changes to the grand total, the payment schedule will dynamically alter itself to include 100% of whatever the outstanding balance is.
This is just one example, but it covers the bases of how using percentage-based payments can help to straighten things out.
Ever have a client change their mind and want to go back to something you've done before? Of course, you have, that's why we have a feature that allows you to revert to previous versions of your worksheets.
In Details, every time you save a worksheet a new version is created, and you can access those versions and restore them at any time!
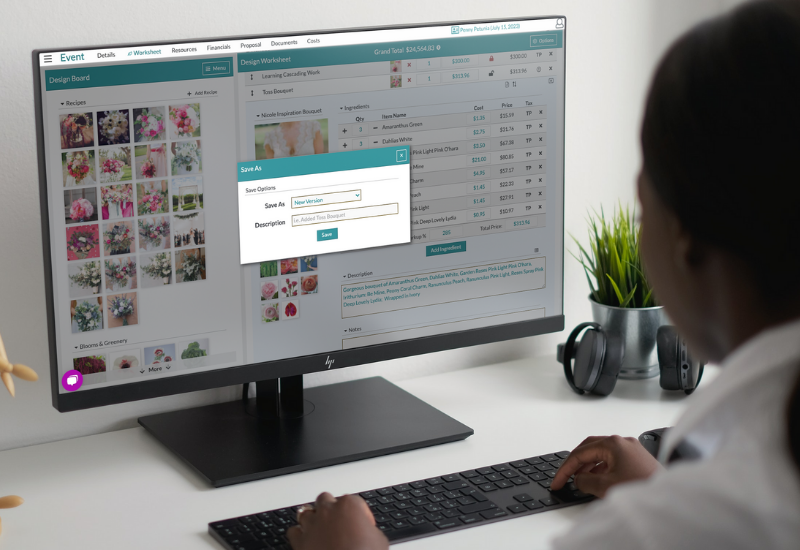
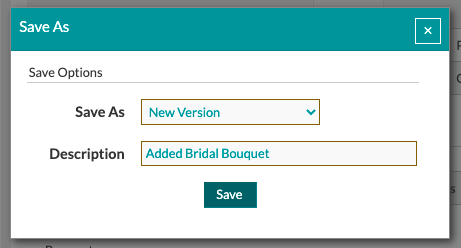
Follow these steps to save a new worksheet version:
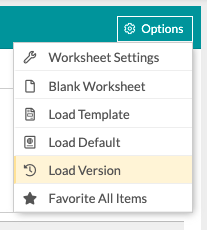
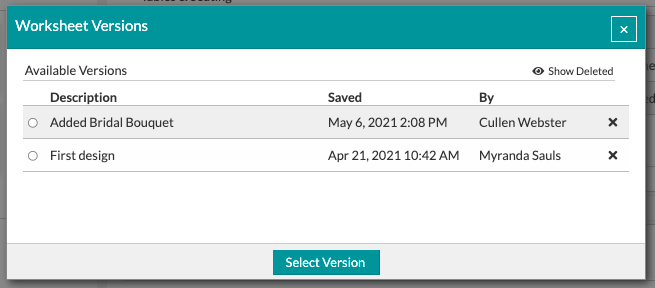
If you need to access any of your previous versions, follow these steps:
If you're not familiar with how to enable autosaving, stop here and check out this Support Center article: Worksheet Autosaving
It's important to note that if you're using the Worksheet Autosaving, there is only one autosaved version. Every time the worksheet is autosaved, it rewrites the existing autosave file. That's why it's still important to manually save versions periodically so you have them to revert back to!
Keep an eye on your inbox each week to get in-depth educational content for all things Details and, as always, reach out to our Support Team if you need anything! You can reach us by emailing support@detailsflowers.com from the chat option within your account or by using the 'Contact Us' form also found within your account under the 'Support' menu!