
Every week we send out an email to existing clients with helpful tips and tricks for using Details Flowers Software. The Support Team looks at trending questions each month and works to identify ways we can help to spread knowledge to everyone using the platform. Make sure you're subscribed to the Education & Support messages from Details to get these helpful emails!
Auto Saving
Follow these steps to turn autosave on for your worksheets:
Important Note: Autosave is enabled on a user-by-user basis, and not for the entire account. Each user that would like to use this function must enable it themselves by following the aforementioned steps.
Once autosave is enabled for you, you'll be able to make changes throughout the worksheet that will trigger periodic saves every 15 seconds. You'll know the page is being saved when you see the 'Save' button at the bottom-center change to 'Please Wait' and then a note will appear next to the 'Save' button that indicates the last time the page was autosaved.
-Jul-20-2021-06-00-26-88-PM.gif?width=600&name=ezgif.com-gif-maker%20(2)-Jul-20-2021-06-00-26-88-PM.gif)
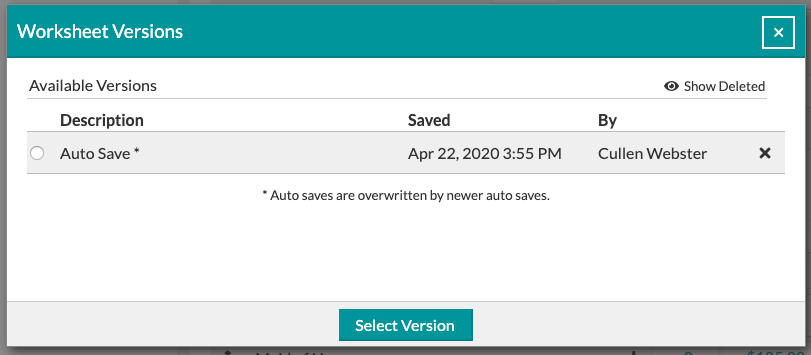
It's important to note that if you want to save specific versions of your worksheets, you should still manually save periodically and include a description. The autosave feature continually overrides itself, so there are not multiple autosaved versions, there is only one that is updated every time the page saves.
To get started, click the 'Settings' button in the top-right corner of the Event List. You'll see a window open displaying all of the Event List settings - let's break them down!
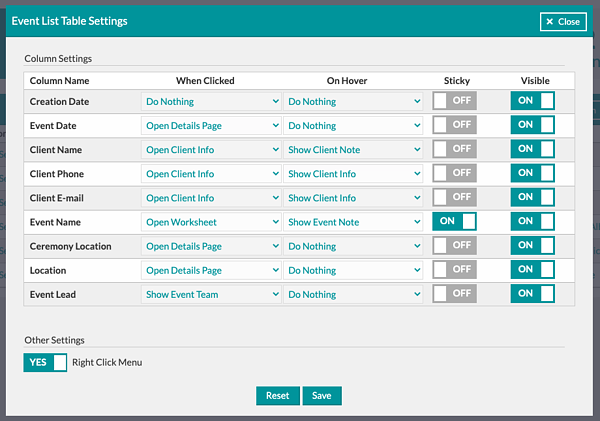
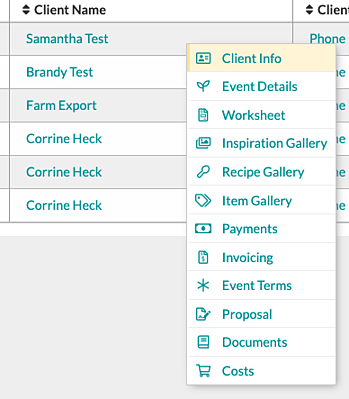
Under the 'Other Settings' section, you'll see an option to toggle the 'Right-Click Menu' on and off. The Right-Click Menu will allow you to right-click on any column of any event to quickly and easily navigate to various related pages for that event.
Be sure to save any changes by clicking the 'Save' button at the bottom-center of the Event List Settings window!
As a Details Flowers member, you have the ability to turn past events, trends, packages, and more into a Worksheet Template that you can use again and again!
Templates can include:
-2-1.gif?width=600&name=ezgif.com-gif-maker%20(9)-2-1.gif)
Tip: Whenever you load a template, open the 'Options' menu in the top-right and select 'Favorite All Items' to add all of your worksheet items to the Design Board for easy use!
Not long ago we introduced a feature that allows you to add custom properties to any of your events, and even search by them from the Event List. Let's revisit this feature!
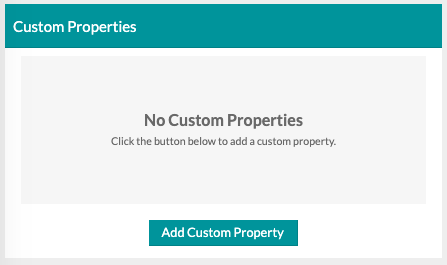
Custom properties are created from the Details page of any event. In the lower-left part of the page, you'll find a box for the Custom Properties - get started by clicking the 'Add Custom Property' button.
For each custom property, you'll enter in a Property Name and a Property Value. The name is a label, like 'Budget', whereas the value would be something like '$5,000' in relation.
There are three kinds of Custom Properties:
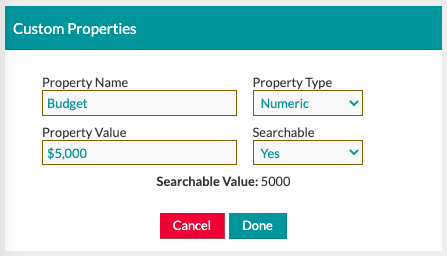
Text and Numeric fields are searchable, and you can toggle that option on or off when you're creating or editing the property under the 'Searchable' dropdown menu.
If a property is searchable, you can include it as a search parameter from the Event List, just as you would with any of the standard search parameters available there!
Not familiar with the Event List search? Check out this Support Center article for more information: Searching the Event List
Keep an eye on your inbox each week to get in-depth educational Tips & Tricks content for all things Details and, as always, reach out to our Support Team if you need anything!
Reach out to us any time by emailing support@detailsflowers.com. You can also chat with us from the chat option within your account, or by using the 'Contact Us' form also found within your account under the 'Support' menu!