This month's Tips and Tricks webinar series focused on Company Default Settings! If you did not have a chance to join us for this session. Here is a recap of what you missed!
Company Settings: Info
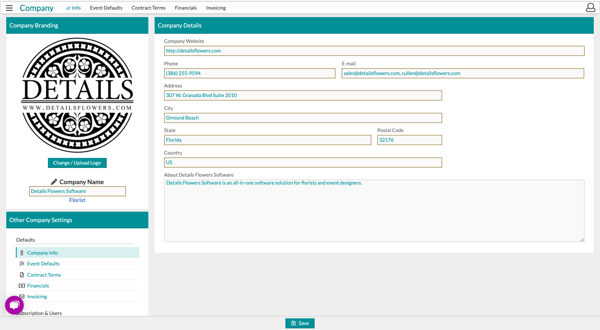
Before you get started, it's important to fill in your company details!
Here's what you need to do to completely fill in your Company Information page:
Upload your company logo. While there is no standard size, 600px x 200px works well.
Enter your company name - it's easy to miss! Make sure you fill this in, otherwise you will not be able to access the proposal page.
Fill in the rest of the details on the right side of the page. For your website, your welcome to use any kind, such as Facebook or Instagram.
For email, you're able to have multiple listed to receive signed proposal notifications. To do this, separate the emails by a comma ","
Please note: All listed emails listed in the 'Company Info' page will show on the 'Proposal'.
The 'About' section is completely optional. At this time, it does not show in any area of the proposal.
Company Settings: The Event Defaults
Setting up your Event Defaults will ensure you're applying the correct fees, taxes, and starting out with your preferred line items for new clients. These settings will apply for every event - so there's not need to adjust each time!
Access your Event Defaults in the main menu under the 'Company' section. In this article, here are the items you will learn to adjust on your Event Defaults:
Markup
Admin Fee
Tax Rates
Categories and Line Items
Fees
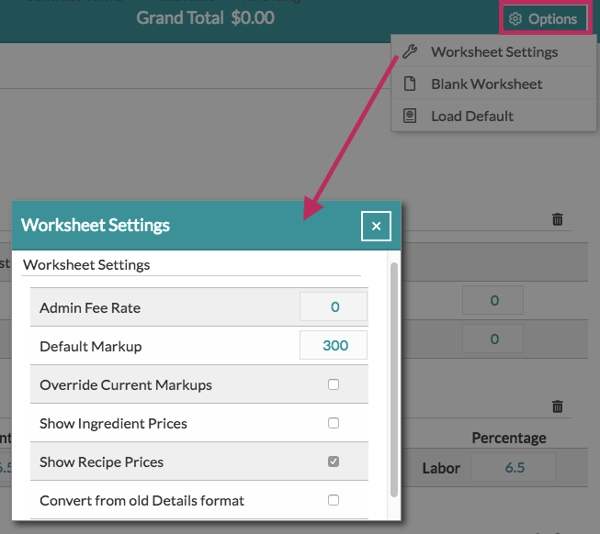
Markup:
Your default markup may be adjusted by clicking the "Options" button in the upper-right corner of the screen. As a reminder, prices are calculated by taking the cost x markup + cost. More simply put, take the markup you see and add 100% This is the total markup your recipes are using.
Admin Fee:
Do you like to add a percentage to your events to pass along any credit card fees? Details makes this easy! Click the 'Options' button in the upper-right corner of the screen and type in your percentage in the Admin Fee box.
Please confer with your accountant before you charge any convenience fee to learn if it is legal in your state and/or how to appropriately apply it.
Tax Rates:
If you're just getting started, you should see a tax row on your Worksheet already. Simply enter in the rates appropriate for your area. If you do not charge tax on Services/Labor, enter in "0"
If you're adjusting your taxes and you do not see the tax row, click, hold and drag a tax section over to your Event Default Worksheet (you can even do this within a specific event!)
A note on line item taxes: On the far-right of each line item, you'll see a "TP" or "TS". This is what tells the software whether to categorize that line item as a product, service, or tax. Right click the "TP" to change this. If you do not charge tax, no tax will be applied. "NT" stands for non-taxable product.
Categories and Line Items:
One of the most important portions of updating your Event Default worksheet is setting your preferred categories and line items, so when you enter in a new client, most of the work is already done!
Hover over the category group/line item name and click to change the text.
Click, hold and drag a line item to change the order.
Click the 'X' to delete the line item or click the trash can to remove the entire section
Click inside the 'Est Price' box to update the line item with your average prices - the price will automatically "lock" in. Click the lock again to unlock it. (Locked line item prices will not adjust as you build recipes. They will stay as you set it). The Estimated Price is important when completing quick quotes - think of this as your average prices.
OPTIONAL:Click the "+" sign to add a note or description. For example, do you always offer a complimentary toss bouquet? Add in a note! This will load for every new client.
Do you like your fees to be itemized with the rest of your line items? Alternatively, maybe you prefer tacking on 20% to each event. Whatever your preference, Details can make it happen! Special Note: If needed, fees may be adjusted within the event itself.
Read each section below to learn the basics. For a more in-depth tutorial, check out this article:How do I add fees to my event?
Fees: Itemized with your line items:
For this, use a 'Category Group' (or the 'Services' category that already lives on your worksheet). Add in your quantity and price. Make sure you change it from 'TP' to a 'TS' or 'TL'. Want to learn more about the TPs, TLs and so on? Check out this article:What is the difference between a TP, TS, TL, and NT?
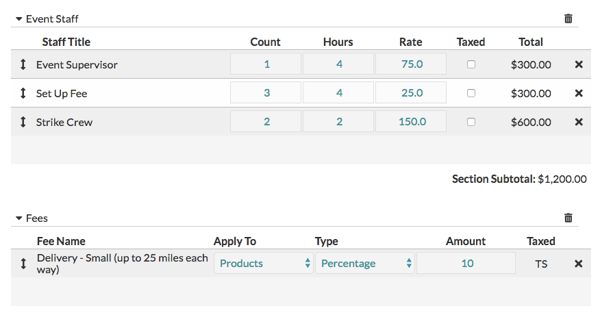
Fees: Using percentages & staffing section:
Using the 'Fee' or 'Staff and Labor' section gives you a bit more flexibility, however, it's important to note that these will not show with the rest of your line items. If you would like them itemized, you must include the Breakdown Page of the proposal. Just as the line items above, you can change the information in your Event Staff and Fees section.
To add a percentage fee:
Add a fee row (simply click below the group). Add in a name.
Select what you would like it applied to. Most commonly, this will be 'Products'
Change the type to % via the drop down.
Type in the amount (For 10%, type in 10. Do not use .10)
The Fees section will always default with a 'TS' - please feel free to change it to 'TL' if you wish to have it categorized as Labor.
Once you click 'Save' at the bottom, your changes will be applied to the next client you add into the system.
The Staff & Labor section:
This provides you a space to list out members of your staff, the qty, hours, and rate. This area will automatically be classified as 'Labor' and can be itemized on the Breakdown page.
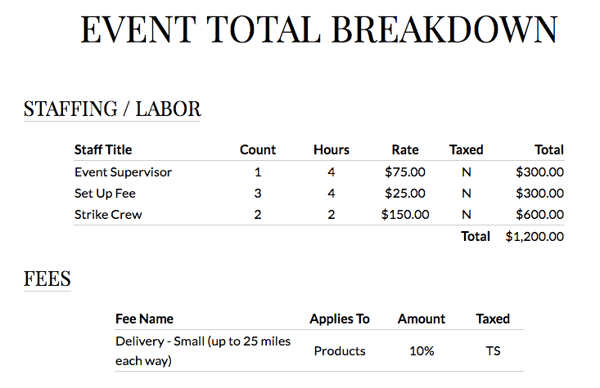
Here is how the 'Fees' and 'Staff and Labor' section will show on the proposal Breakdown page.
Company Settings: Financial Defaults
Your financials page is where you will set up your default payment schedules, tax settings, and payment settings. Once your defaults are set, it is automatic for each and every event! Make sure you save your settings!
In the article below, you will learn:
How to change your currency type.
Add a convenience fee percentage.
How to set up your default payment schedule.
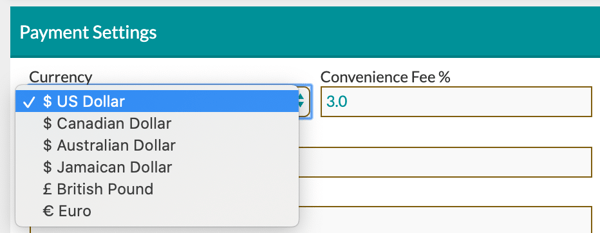
Change your currency type:
From the currency menu, click the drop-down and select your currency. At this time, the available currencies are US Dollar, Canadian Dollar, Australian Dollar, Jamaican Dollar, British Pound, and the Euro. We plan to add more in the future!
Add in your convenience fee:
Many Details customers opt to pass credit card processing fees along to the client. Enter your ideal convenience fee in the space provided to charge a convenience fee to asingular payment. Please check with your accountant if convenience fees are legal in your state.
This is not automatic! It must be activated. Once the credit card box is clicked on the specific event Payment page, it will add the percentage back to the outstanding balance.
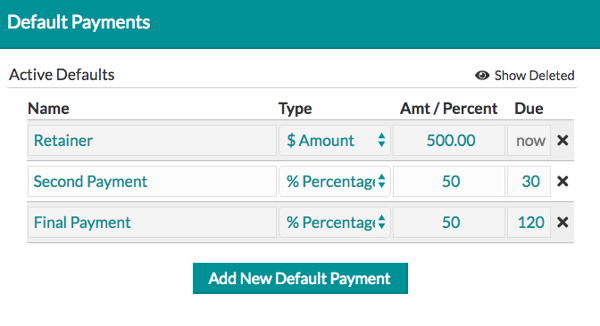
Adjust the default schedule Details starts you out with by clicking 'Add New Default Payment' to add additional payment rows or clicking 'X' to remove any rows you don’t wish to use.
Adjust the rows to reflect how you would like to collect your payments. If using a flat dollar amount, select '$' under 'Type'
If using a percentage, select “%” under 'Type'
Type in the percentage or dollar amount.
Make sure that your percentages total 100% (See photos below)
Under the 'Due' column, type in the number of daysbeforethe event that the payment is due. If left blank, the payment is duenow.
All percentages must equal 100%
The Financials: Using Details Invoicing
Invoice clients and collect payments directly through your Details account!
Details is partnered with Stripe to process payments online - this a great way for you to save time. Simply set up a payment schedule and invoices will automatically be sent out to clients based on your preferences.
Setting up your account
To get started, go to the Invoicing page of the Company settings where you'll find this button.
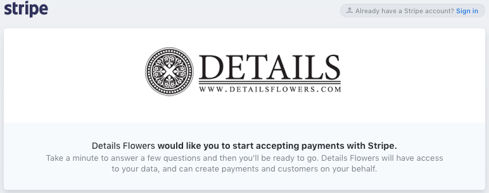
Click on it to get started and then you'll be taken to Stripe and prompted to set up your account. You should see this at the top of the page:
If you already have a Stripe account, just click the 'Sign in' link in the top-right corner. Once you've either connected your existing account or registered a new one, you're ready to start invoicing your clients and collecting payments!
Setting up your invoices
Follow these steps to set up your payment schedule:
Within an event, navigate to the 'Payments' page under 'Financials'.
Your default payment schedule will be displayed here, and you can make changes if necessary.
Click 'Save' to complete
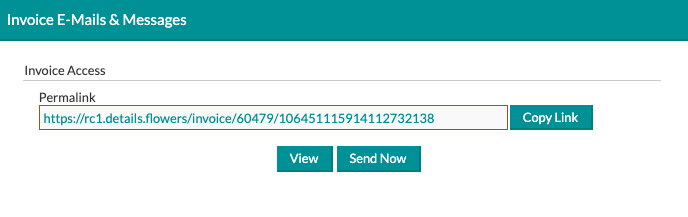
Once your schedule is set, head over to the 'Invoicing' page under 'Financials' to customize the invoicing schedule. Keep in mind that you will need an email address saved to the client's profile in order to set up the invoicing auto-send feature.
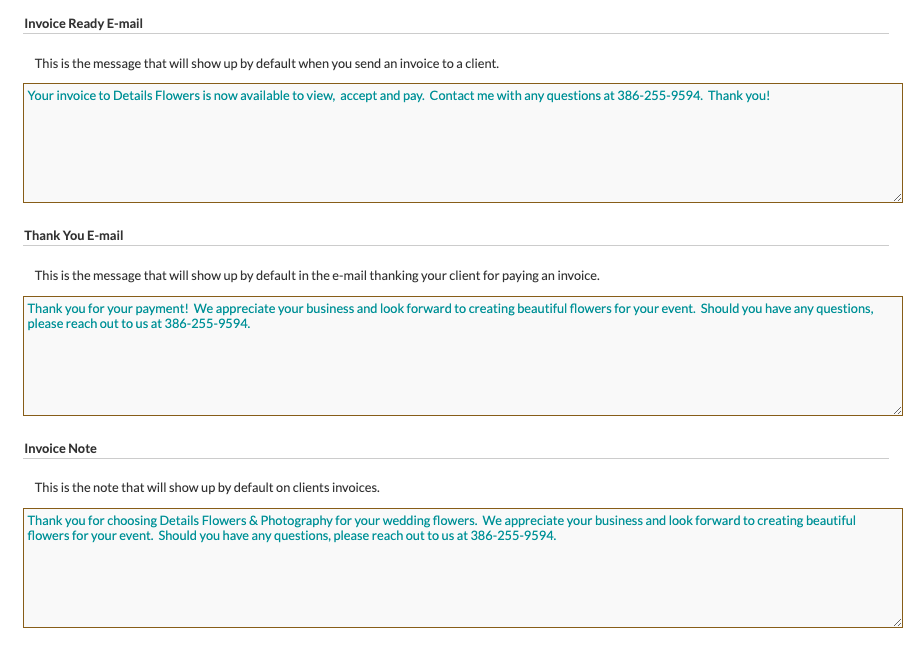
Set up your applicable messages.
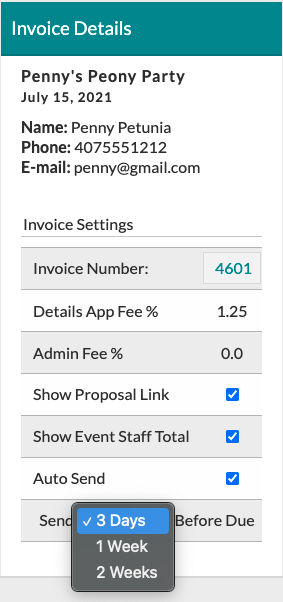
Verify the settings.
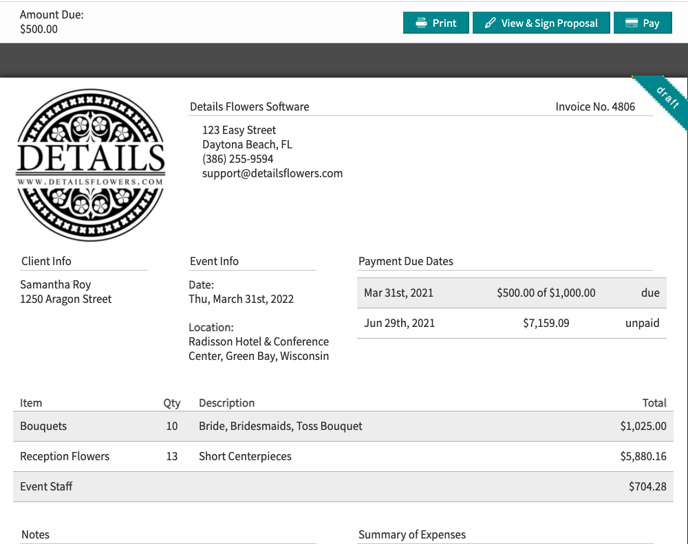
Preview the invoice or copy the link to send to a client yourself.
After clients accept and sign, they will be directed to the invoice for their payments and they can process those payments with a credit card right then and there.
Company Settings: Default Contract Terms
Set up default contract terms for each proposal. These can be amended on an event-by-event basis, but having strong defaults is an important step to getting started!
Details Flowers provides some basic contract terms you can use, or you can create your own. With the pre-sets, you're able to simply enter in your own specifics, such as your company name.
To get in and edit each section, click the arrow icon next to the desired section.
It's important to review each term. Click the right-pointing arrow to pull up the text. Look for items such as 'COMPANY_NAME' or 'PERCENT' as these are spaces you need to input your own information.
You can also use our 'Contract Tokens' feature to automatically populate certain information for each event. Learn more about 'Contract Tokens' byclicking here!
Don't want to use a certain term? Click the 'x' to delete it
Accidentally delete a term? Click the 'Show Deleted' at the top of the terms to view the deleted items. Click the round arrow icon to restore it.
Want to change your contract terms for a specific event? Check out this Support Center article to learn how:Managing Contract Terms
The Proposal: Proposal Settings & Defaults
Save your desired proposal settings and defaults from the Proposal Settings menu!
You now have the option to save your desired proposal settings, create proposal setting defaults, and create proposal templates in one easy location on the 'Proposal' page of your events.
General Proposal Settings
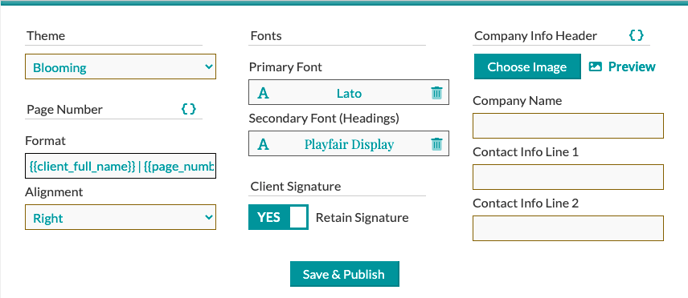
Using the proposal settings section, you can adjust the settings for the event proposal you are currently working on.
Theme - choose from any one of your proposal themes by clicking the drop-down menu and clicking on the theme you would like to use
Page Number - This will display at the bottom of each page of the 'Proposal'
Format - Use any available 'Proposal Token' or type direct text into this line to choose what verbiage you would like displayed. If you are not familiar with 'Proposal Tokens' check outour Support center Articleto learn more! In addition to any of the existing proposal tokens, you can also add the or tokens in this field only.
Alignment - Choose if you would like your page number footer displayed on the left, right, or center of the page.
Fonts - Choose the fonts you would like to use in your proposal. These fonts will be used on every page of the proposal
Primary Fonts - Primary fonts will include any text that is not a heading
Secondary Fonts - Secondary Fonts will include all of your page and section headings
Company Info Header - change out your company logo or company information from this area. (Think multiple locations or branches!)
Company Info Header - Change out your companies logo that appears at the top of most proposal pages
Company Name & Contact Info - Use tokens or text to fill in your desired company information that will display at the top of your proposal pages
Retain Signature - You can choose to retain the client's signature when you publish a new version of the proposal or choose to clear out the current signature
Proposal Defaults
You now have the option to set your own proposal defaults! Fill in the font style, theme, and company info you would like to appear by default each time you come to the 'Proposal' page of an event.
To save your settings as a default, follow these steps:
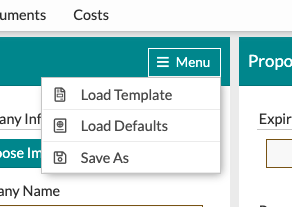
Click the menu button in the upper right-hand corner
Select 'Save As' from the drop-down menu
On the resulting modal, click the 'Save As' drop-down menu to select 'Proposal Defaults'
Add a Description if you would like
Hit the 'save' button!
Proposal Templates
Details users will now have the option to save 'Proposal Templates' just as you can with the 'Worksheet' and the 'Event terms' pages. Proposal templates will allow you to completely duplicate a proposal with the exception of the event-specific information. Items saved include the following:
Fonts
Company Information
Logo Image
Cover Images
Concept Images
Font Color (available on certain themes)
Text background color (available on certain themes)
Concept Feeling Text
Page settings (hiding or showing a page or section)
Footer alignment and verbiage
Company Rep Signature
Company Rep Signature Date
To save a 'Proposal Template', follow these steps:
Click the menu button in the upper right-hand corner
Select 'Save As' from the drop-down menu
On the resulting modal, click the 'Save As' drop-down menu to select 'Proposal Template'
Add a Description
Hit the 'save' button!
To load in a saved template, click the 'Menu' button in the upper right-hand corner of your 'Proposal Settings' section and select 'Load Template from the available options.

.gif?width=600&name=ezgif.com-optimize%20(2).gif)
.gif?width=600&name=ezgif.com-video-to-gif%20(23).gif)
.gif?width=600&name=ezgif.com-video-to-gif%20(24).gif)
-Aug-26-2021-07-01-46-20-PM.gif?width=600&name=ezgif.com-gif-maker%20(1)-Aug-26-2021-07-01-46-20-PM.gif)