

In this month's edition of our Tips and Tricks series, our Support Team Director, Brandy, discusses our newest feature The Inspiration Gallery. If you missed our live webinar, here is a complete session recap!
*This edition is currently only available to our Details Flowers Software beta testers. If you have interest in becoming a beta tester for future projects, please fill out this form.
Finding Your Inspiration Gallery
The Inspiration Gallery can be found in the ‘Resources’ section of the Main Menu or the ‘Resources’ tab at the top of your page if you are inside an event. Once inside the Inspiration Gallery, you will see an ‘All Inspiration’ collection to get you started. Everyone will have this collection as a default. If you already have images uploaded in your Inspiration Gallery, those images can now be found in the ‘All Inspiration’ folder.
Editing an Image in the Gallery
When you click into ‘All Inspiration’, you will see all of your uploaded inspiration images. Similar to the previous version of Inspiration Galleries, when you hover over an image, you will see a trash can icon and a star icon. With this new collection feature, however, there will be an additional icon that looks like a small pencil.

Clicking on the trash can icon will delete the image. To restore an item that you have deleted, you will following the steps below:
Clicking on the star icon will add that image to the ‘Inspiration Board’ on the left-hand side of the screen. By clicking on the new pencil icon, you can edit information regarding that image.
Once you click on that icon, a box will appear called “Edit Inspiration”. There will then be several actions you can take from you. The first tap is ‘ Description'. You can change the name here, which is useful when searching for images. You will also be able to edit the ‘Description’ of the images and the ‘Category’. The second tab is “Color”. Here you can assign colors from the images. This can be done by clicking on the plus sign icon or pulling colors from the image.
Colors can be pulled from the image by clicking on the small landscape box above the plus sign icon. This will automatically add that specific color to your selection.
-Jan-27-2023-08-52-21-1706-PM-1.gif?width=600&height=345&name=ezgif.com-gif-maker%20(8)-Jan-27-2023-08-52-21-1706-PM-1.gif)
The third tab is a brand new feature: ‘Tags’. Tags make it easier for users to find and search for images without having to scroll through every single inspiration image uploaded.
Details provides ‘Popular Tags’ that can be added to your current tabs by simply clicking on the tag itself. You can also create your own tags by typing in a word or phrase into the “Add Tag” area. To delete a tag, you will click on the trash can icon in the upper right. If you accidentally delete a tag before saving, it can be restored by clicking on the restore button. Unlike deleting other information in the software, after deleting a tag and saving that session, you will no longer be able to restore that specific tag. You will have to re-enter the word or phrase manually.
The last tab in the ‘Edit Inspiration’ box is ‘Other’. Here you will see two sections: ‘Alternate Text’ and ‘Attribution’. These two areas can provide attributions for the image. Examples of attributions could be the photographer, the grower, the model, etc. And as a reminder, any changes you make, always click save at the bottom of the screen.
Searching Your Inspiration Gallery
In your ‘Inspiration Gallery, you can search for images based on various factors. These include Image Location, Name, Category, Colors, and Tags.
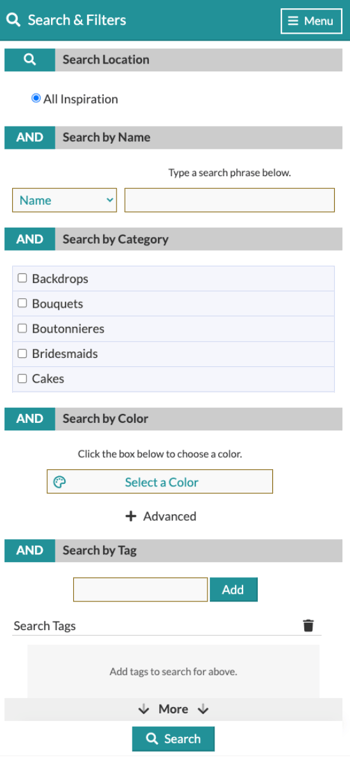
To search, you will click on the Menu icon in the upper right-hand side of the ‘Inspiration Board’ and select ‘Search & Filters’. For the category section, every account will start off with ‘Not Categorized’. This will be changed after you make edits to the Category Section in the ‘Edit Inspiration’ box as we mentioned above.
Table View
Accessing ‘Table View’ can be done by selecting the icon that says ‘Table’ in the upper right-hand corner of the screen. ‘Table View’ will display your images in a list view. Here, you can sort by name, most recent, and last update. This can be done by clicking on the ‘Sort’ shown at the top right-hand side of your screen. Similar to the Item Gallery, you can edit your inspiration image information in table view by clicking on that line item.
Adding Inspiration Images
To add new images to your Inspiration Gallery, you will click on ‘Add New’ on the top right-hand side of your screen, click on ‘New Inspiration’, and then upload either a URL or an image from your computer.
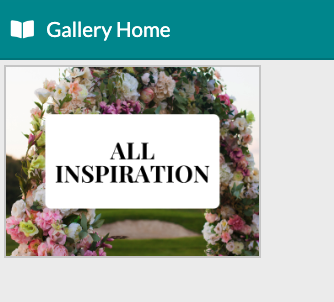
Gallery Home
At any point in time, while you are in your Inspiration Gallery, you will click on the book icon next to ‘Gallery Home’ to access the home page that allows you to see all of your Inspiration collections. As we discussed above, your account will automatically place any previously uploaded images into the ‘All Inspiration’ folder.
Creating New Collections
To create new collections, you will select ‘Add New’ in the upper right-hand corner and click ‘New Collection’. From here, you will be prompted to give the collection a title, description, color, and also have the option to add a background color or background image. And as a reminder, always click Save after filling out any new information into your account!
Filling Out a Collection
To place images into a collection within the Inspiration Gallery: follow the steps below:
Slideshow Feature
Another new addition is the slideshow feature. In the Inspiration Gallery, you will now be able to click on an image, and on the right-hand side of that now-enlarged image, there will be an arrow. This will allow you to view your images in a slideshow display by continuously clicking on the arrow to view the next image.
Watch the full replay of the webinar below!