

Every week we send out an email to existing clients with helpful tips and tricks for using Details Flowers Software. The Support Team looks at trending questions each month and works to identify ways we can help to spread knowledge to everyone using the platform. Make sure you're subscribed to the Education & Support messages from Details to get these helpful emails!
Every Details account comes with at least two authorized users. If you have an Enterprise account, your account comes with four users. Let's check out how to add and remove users to and from your account and learn more about the different permission levels available!
To manage the users for your account, open the main menu, select 'Settings', and then select the 'Authorized Users' page from the resulting options. Once you're on the Authorized Users page, you'll see any existing users and invitations, and some options to add and remove authorized users:

Note: The invitation will be sent by email and must be claimed within 24 hours!
Each user has a permission level, and there are three options. The permission level is set when a user is added, and then can be edited by users with greater permissions (i.e. an Owner can edit a Manager). The permission levels are as follows:
For a full breakdown of what each level has access to, check out the Support Center!
The Event List Search
The Event List is best known for housing all of your events in Details. When you get to a point where you have hundreds of events, what do you do when you need to find a specific event? The answer is simple: by using the Event List Search and Filters option!
In the upper right-hand corner of your Event List, you will see the 'Search' button. The search area will initially show up with three different search criteria: Client Name, Event Name, and View.

To the left, you will see a drop-down menu where you can select from 29 different options! In addition, any Custom Properties you may be utilizing in your events that are set to 'Searchable' can also be selected from the drop-down menu. Click the 'Add' button to add any filter to your search criteria.
💡To learn more about Custom Properties, check out our Support Center article: Using Custom Properties
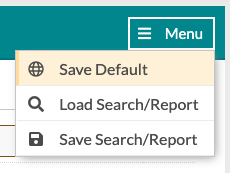
If you have a search that you are running over and over again, you can actually save that search! Follow these steps:
To learn more about the Search & Filters option on the 'Event List', check out our full Support Center article here.
Changing Tax Rates
Found under the Company Settings of the main menu (top-left corner) is your Event Defaults page. There are quite a few things to do here, but the main idea is that this is your default worksheet that is loaded up each time you create an event.
We're going to focus only on the taxes portion today, so if you're not familiar with the Event Defaults, this is a great time to take a moment and review this Support Center article breaking down the whole page 👉 The Event Defaults
Once you're on the Event Defaults, you'll see the 'Taxes' worksheet section near the top (unless you moved it) and then you should enter your new tax rates and save your changes, as seen below!
The process of updating the taxes for your existing events is quite similar, but with a few extra steps before we enter the new rates and save our changes. From the worksheet of any of your events, you can access the 'Taxes' worksheet section and edit just the same as in the Event Defaults.
Typically, the 'Taxes' section isn't going to be displayed by default on event worksheets, so you should follow these steps to pull the section in for you to edit:
At the top of every event in Details you will see the client's name and event date. Did you know that you can click that area and see a TON of information about the client and their event? Let's dive in and explore everything this feature has to offer
The first sections you will see when opening the Client Quick Menu are the 'Client Info' and 'Event Info' sections. Here, you will find the client's phone and email as well as the event's name and date.
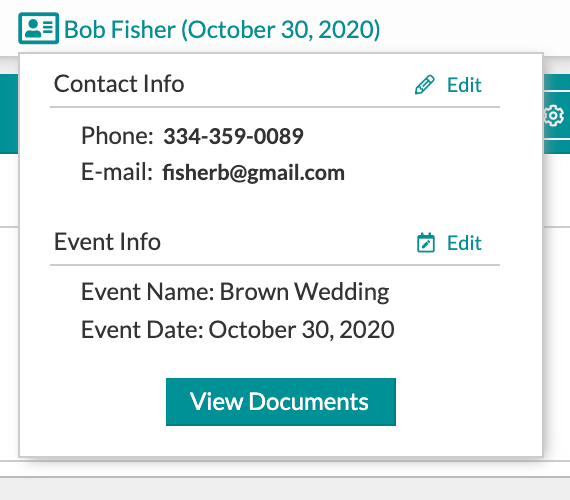
Clicking the 'Edit' button next to 'Contact Info' will take you directly to that client's record and clicking the 'Edit' button next to 'Event Info' will take you over to the Details page for that event!
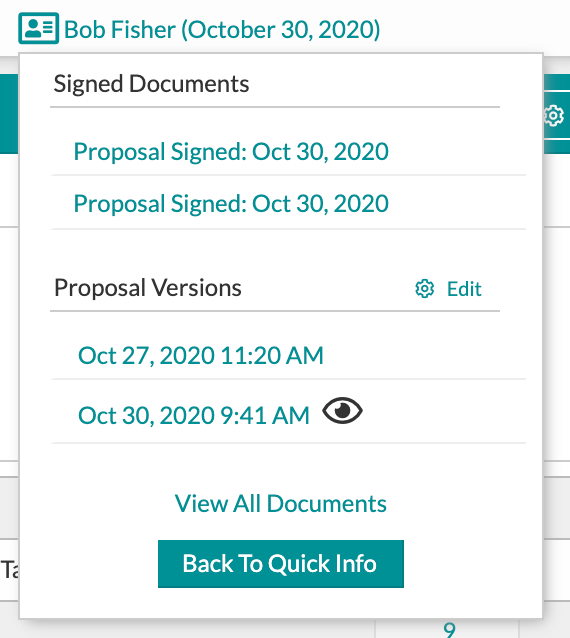
When clicking on 'View Documents' the menu will switch over allowing you to view every time the Proposal has been published and every time the proposal has been signed. Clicking on any version listed in either section will allow you to view the PDF from that particular iteration of the Proposal PDF.
At the very bottom, you will see an option to 'View All Documents'. This will take you directly over to the 'Documents' section of your event where you can view the Executive Summary, Recipe PDF, and Delivery PDF.
💡Learn more about the Documents area of Details in our Support Center by clicking here!
To learn more about the client quick menu, check out our Support Center article here!
Keep an eye on your inbox each week to get in-depth educational content for all things Details and, as always, reach out to our Support Team if you need anything! You can reach us by emailing support@detailsflowers.com, from the chat option within your account, or by using the 'Contact Us' form also found within your account under the 'Support' menu!