
In this month's edition of our Tips and Tricks series, our Support Team Director, Brandy, discusses how to use our newest feature: Email Notifications and Invoicing Statistics. If you missed our live webinar, here is a complete session recap!
With our new Email Lists, Email Scheduling, and Analytics tracking, you can now effortlessly showcase your brand and track client interactions like never before! All of these features are a part of Details invoicing. If you are not already connected with Details invoicing, we highly recommend that you do! This will give you some added options as far as receiving payments directly through the site!
Accessing these Features:
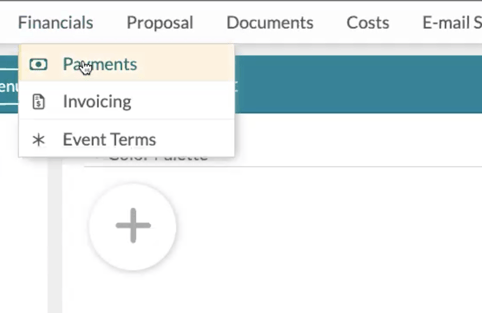
Once you are inside an event, you will click on the Financials Tab at the top of your screen. Let's start by clicking on 'Payments' in the drop-down menu. If you have your default payment schedule set up in your company financials area, this will automatically correlate with your event!
IMPORTANT: If you enter this page and the dates listed for each payment are gray and not blue, you will want to click into that box, confirm the date, and click 'Done'! This will play a crucial role in the scheduling of your emails.
Invoicing Tab
Next, we are going to head over to our Invoicing page by clicking into the Financials tab at the top of your screen and selecting 'Invoicing'. This page already existed before these new updates were added. However, we now have a few additional options for you to utilize. The first new feature on the Invoicing Page is going to be the 'Auto-Send' Feature (which we will get more into a bit later in this blog).
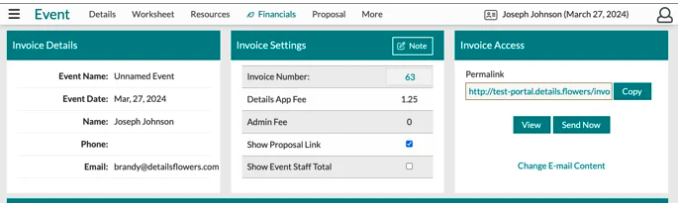
Now let's do a quick overview of the Invoicing Page: To the left will be your Event Details, such as the name, date, and contact information. In the middle will be your invoice settings, where you will find your invoice number as well as your Details App fee and Admin Fee. Also in this section is a checkbox that allows you to attach the proposal link with the invoice - so they will be able to make the payment and sign the proposal at the same time (So convenient, right?). Above this area is a tab labeled 'Note'. This is where you will be able to write and personalize the note that you want to be shown on the invoice. To the right-hand side of the page will be 'Invoice Access,' which is where you will find that invoice link! For those of you that currently have a subdomain, that custom URL will live right in this link!
Why you should use a custom URL with Details!
For those of you who do not have a custom subdomain, we would highly recommend! Now, that domain will be included in these links! Customer subdomains also create more brand identity while making your clients feel safer, knowing that they are clicking on a link that has your company name in it!
If you don't have a custom domain and would like to purchase one, please complete our form here! This is an added feature and will be $60 annually.
Email Settings
This section can be accessed by clicking on 'Change E-mail Content' at the bottom of the 'Invoice Access' section. The Email Settings can also be accessed by clicking on 'Email Settings' at the top of your screen!
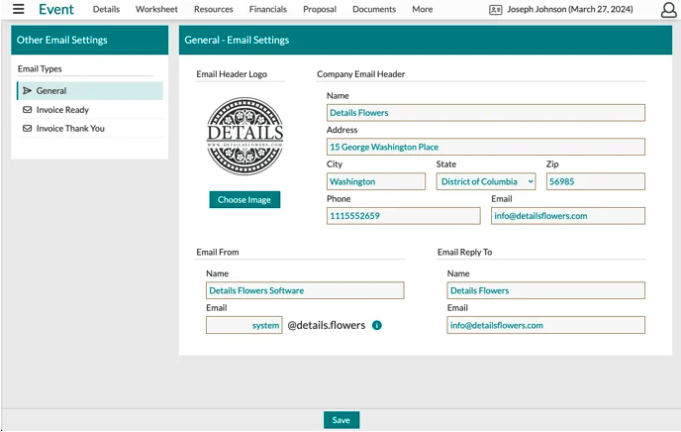
In your general tab here, you're going to find all of your company information that is automatically populated from your company info page. Below this area, you will be able to customize your Email Send Address! On the left-hand side, you will see an area will you can customize your 'From Email'. There will be two sections: 'Name' and 'Email'. The 'Email' section is where your custom URL will come into play! If you don't have a custom URL, the default will be "details. flowers". To the right of this area will be where you can customize your 'Reply Email' just the same as your From.
Invoice Ready, and Thank you
Over to the right-hand side of your Email Setting Page, you will click on 'Invoice Ready'. That will be where we find the area where you can customize the email message, subject line, heading, subheading, etc. This will be what is sent if you click 'Send Now' as well as if you have a scheduled email that has been sent out regarding an upcoming payment. Also on the left-hand side of your screen, under 'Invoice Ready', you will see 'Invoice Thank you'. Once your client has made a payment, this email will automatically be sent. All fields here are also customizable to the verbiage you like best.
Auto Sending
Now, let's go back to the Financials tab at the top of your screen and click back into the 'Invoicing' area. On this page, down at the bottom, you will see a section called 'Auto-Sending'. If we click on the "+ Schedule", we will see the different lines show up here. Under the Payments area, you will be able to easily click and switch between your Retainer, Second Payment, Final Payment, etc.
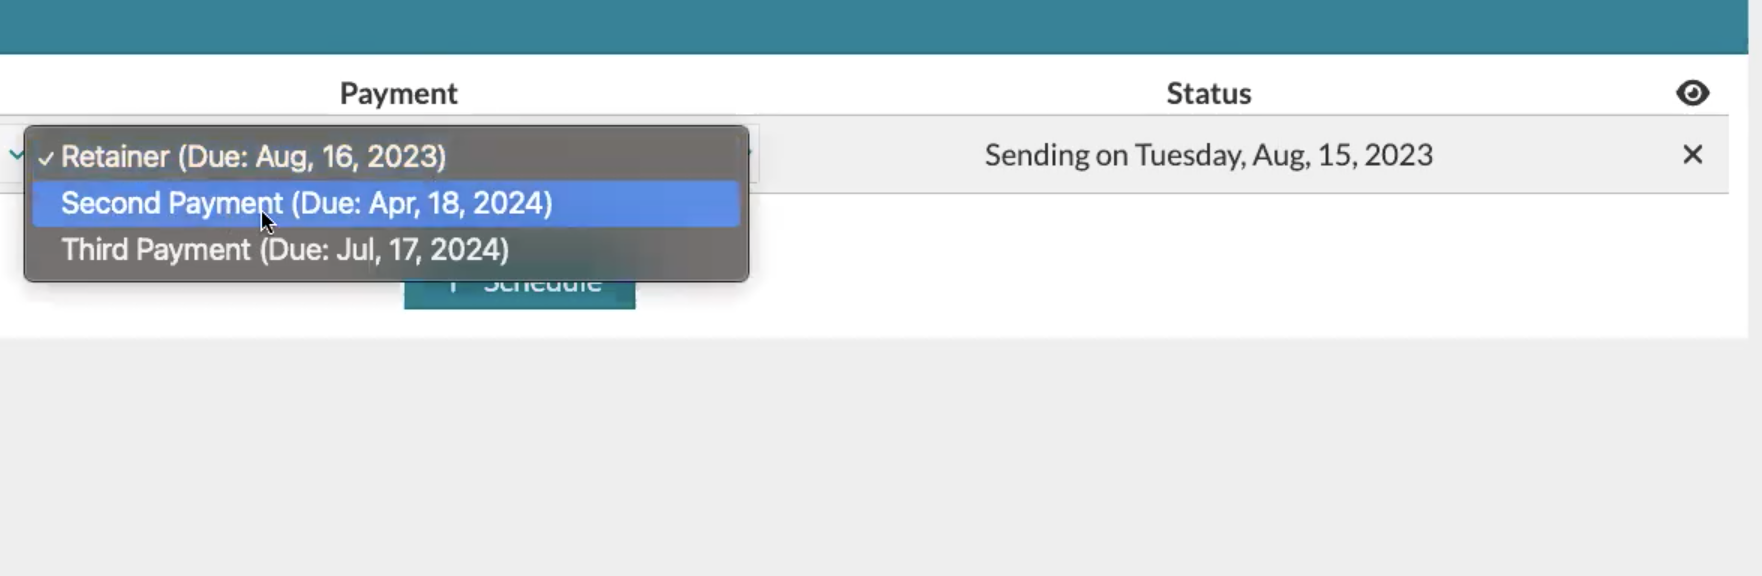
To the left will be two areas called 'Days' and 'When'. These two sections will determine how many days your email will be automatically sent, either before or after the payment! We recommend using the 'Before' option as those initial reminders that their payment is coming up, while the 'After' option can be focused more towards that final nudge if perhaps your client was a bit extra busy that week and forgot to pay on time. Additionally, you will be able to send out a second email prior to the payment date (for those of us who tend to forget things easier than others). This is done by clicking on the "+ Schedule" and adjusting those two sections to the desired date!
And don't worry; our system will recognize if your client has already paid you! If you have that final reminder scheduled - we will make sure they aren't sent after the payment has been collected!
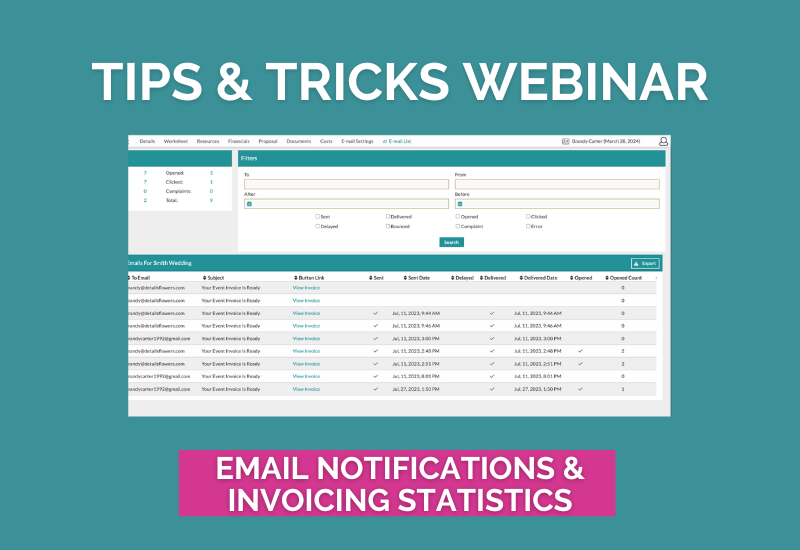
Email Lists
The 'Email Lists' area in Details is where you will find all of the information for your emails sent through the 'Invoicing' area. You will see this option both in your 'Company' settings, where you can see every email sent across all events, and also in your individual events, where you can see emails for that specific event.
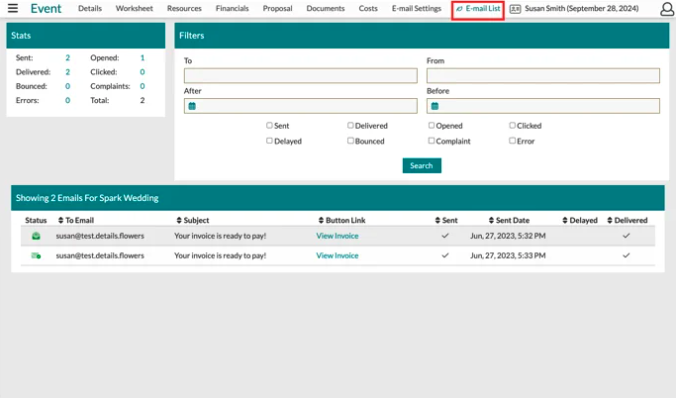
At the bottom of this page, you will be able to see all of the emails you have sent for this event. As you scroll horizontally, the number of times the email has been opened will be displayed, as well as how many times the email was clicked on!

In addition, you will be able to see the delivery date, if the email has bounced, if there was an error, and if there were any complaints (meaning if your email was marked as spam or junk). 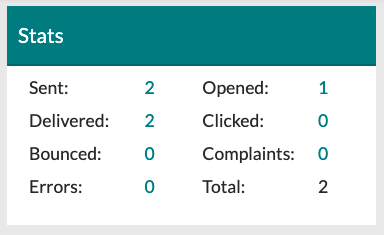 With that being said, you can also track the time and date all of the actions listed above took place by scrolling all the way to the right of this section and double-clicking on 'History'.
In the upper left-hand corner, you will find the 'Stats' section. This is where you can see an over-arching list of your emails' sends, clicks, opens, and more. If you click on the number for a specific status, this will automatically populate search criteria that match that status.
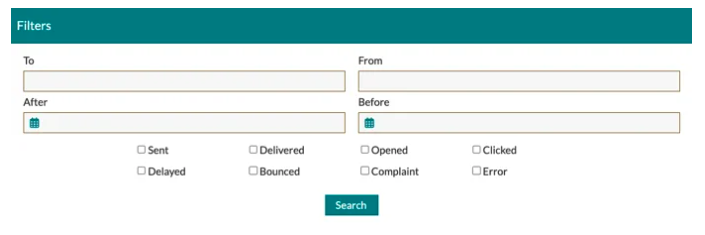
In the top right-hand corner, you will find the search area where you can search by to address, from address, date, and status.
All of the information listed above will be the information needed on a per-event basis. If you go over to the 3-line menu in the top left-hand side of your screen and select 'Company,' you will see Financials, E-mail Settings, and E-mail Lists. From here, let's click on 'Financials'
Company Defaults: Financials
If you are not already connected with Stripe, you will have a button on this page asking you to connect with Stripe. This process will allow you to either create an account or connect an existing one. Once you are connected, you can always come back to this financials area to view payments and bank transfers.
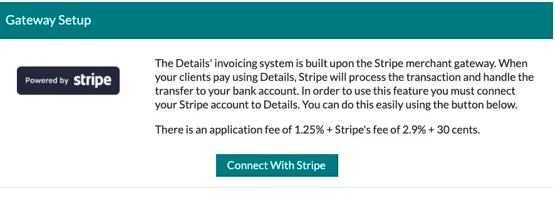
If you are not familiar with Stripe, Details is partnered with Stripe to process payments online - this is a great way to save time. Simply set up a payment schedule, and invoices will automatically be sent to clients based on your preferences.
Down in the bottom half of the screen will be the default invoice message! As we discussed above, you of course, will be able to change this message on a per-event basis. However, this page allows you to preset that default note for these invoices!
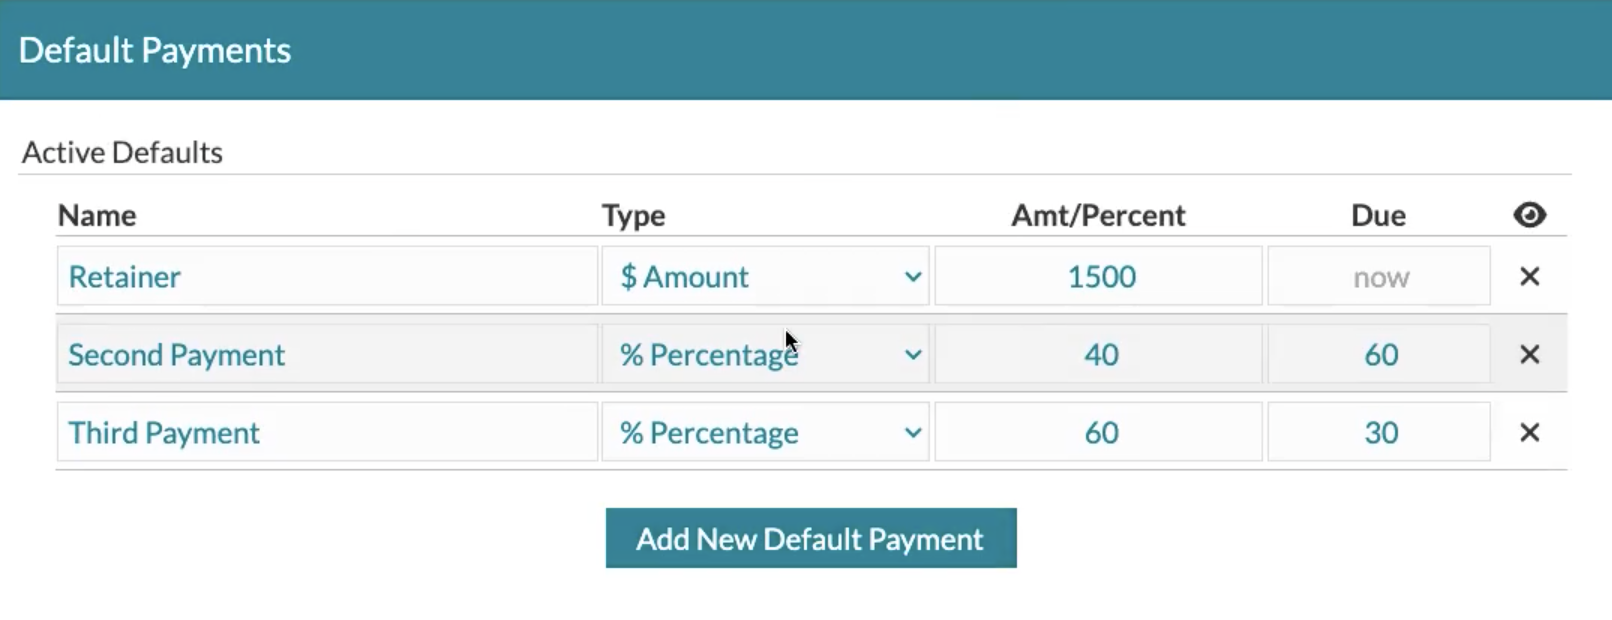
To the right will be the area where you can set up those default payments we also referred to above! We highly recommend that you go in and set that default schedule to save yourself time on each event!
Company Defaults: E-mail Settings
Next, you are going to go into the E-mail settings area under 'Company'. This is where you are going to find all of the info for your invoice emails. The layout will be the exact same as you saw within the event, including the General area, as well as the invoice ready and invoice thank you tabs!
Company Defaults: E-mail List
This is going to be where you are able to see ALL of the emails that have been sent across your entire company. The actions taken on this page to view opens, clicks, who sent each email, etc., will be the same as you have previously done on the E-mail List page within each event.
For further information, we have attached three resources articles below:
Watch the full Webinar replay below!
%20copy%203-1.png?width=449&height=299&name=JUNE%20(5)%20copy%203-1.png)