
In this month's edition of our Tips and Tricks series, our Support Team Director, Brandy, discusses Authorized Users. If you missed our live webinar, here is a complete session recap!
Authorized Users
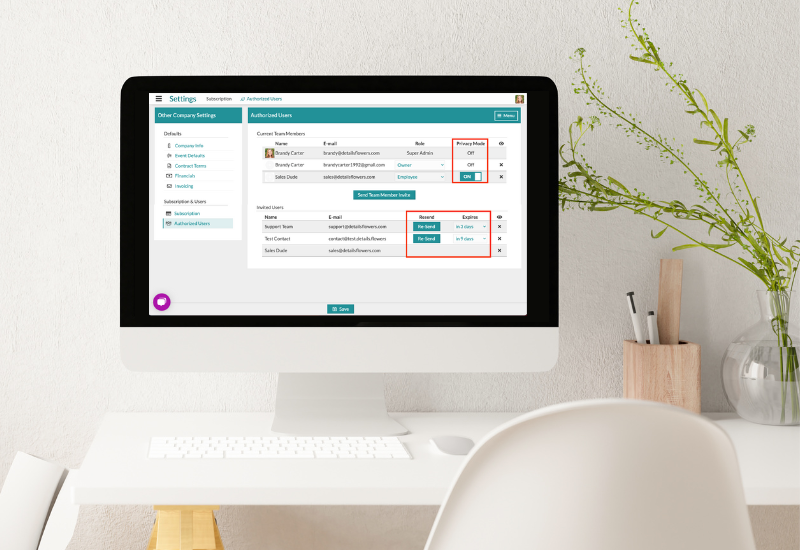
The Authorized Users page shows any users you have and allows you, as a company, to control who has access to certain events and any additional information. To find this page, you will go to the top left corner of your screen and click the main menu dropdown. You will then click on Settings and Authorized Users.
From here, you will see all of your current members and invited users with their contact information. Each user will have a role that will determine exactly what they will have access to within your Details Company account. Users can have three roles: Owner, Manager, and Employee.
Let’s take a look at what each level of User has access to!
Owners: Can access everything in their Details account, including any events. Owners also have permission to edit anything and can enforce Privacy Mode for any and all Employees.
Managers: Can access everything in their Details Accounts; however, they cannot change ‘Owner’ to ‘Manager’ or ‘Manager’ to ‘Owner’. Managers can also enforce Privacy Mode for any and all Employees
Employees: Can only access events that they have created or that they have been assigned to by the Owner or Manager.
A role can be changed by clicking on the down arrow and selecting one of the three.
What is Privacy Mode?
Privacy Mode is a feature that allows you to hide all of the cost and markup information from the entire Details platform. It can be toggled on or off as needed. This can be enabled by any user (privacy mode is per user NOT per company).
Note: Check out this Support Center article for a comprehensive list of what is hidden when Privacy Mode is enabled.
Owners can also enforce privacy mode for all new employees by clicking on the Meny in the top right corner and moving the toggle to ‘Yes’.
Team Member Invites
Team Member invites allow you to send employees or anyone else you want to give access to your account. And remember, you will be able to control through the privacy settings what each user can and cannot have access to.
The following steps will demonstrate how to Send a Team Member Invite:
The new user will then receive an email from Details asking them to create a password, giving them access to the account!
-Dec-05-2022-06-26-53-1974-PM.gif?width=600&height=341&name=ezgif.com-gif-maker%20(9)-Dec-05-2022-06-26-53-1974-PM.gif)
Why should EACH of my employees have their own username and password?
We recommend each of your employees have their own username, login, and password to keep a paper trail for your company. Furthermore, the Owner and/or Manager will be able to better keep track of who changes what, when, and where.
Version Access
Owners can log in and see each time a user logs into an event, makes a change, and saves a new version of that worksheet. Below is a step-by-step on how to access a previously saved version of an event:
Each saved version will display the version description, the date and time it was saved, as well as the name of the Authorized User who saved that particular version. This can be helpful if one employee accidentally saves over a previous version, or if any other problem with users or versions happens to occur.
.gif?width=600&name=ezgif.com-video-to-gif%20(5).gif)
Note: Check out this Support Center article for additional information on accessing past versions.
Costs
In addition to accessing any versions previously saved by users, Details will also show a ‘Quote Activity Log’. To access this information:
This section will show you who sent a request, when the request was sent, and what all changes have been. This can be accessed at any point in time.
Removing an Additional User
Any Authorized User can be removed at any time. Once you are back in your Authorized User page, which is accessed in the Settings tab on the Main Menu drop-down; you will see all of your Current Team Members.
To Remove a User: Find the name of the user you would like to remove, and click on the ‘X’ in the far right corner. After this action is completed, that remover will no longer have access to the account.
Let’s say a few weeks later you want that user to have access again! Details allow you to easily restore any previously removed users.
To Restore a User: Click on the eyeball icon in the top right corner of the Authorized Users list. You will then see all of your removed users and can add a user back by clicking on the restore button. That user will then be added back into your account.


